Run Jupyter Notebooks on VSCode
The landscape of technology is evolving rapidly, with artificial intelligence (AI) at the forefront of innovation. Interest in AI has given rise to a new class of applications known as Intelligent Apps, which harness the power of AI and machine learning (ML) to deliver personalized, intelligent user experiences. The emergence of Intelligent Apps demands a new skill set—one that includes a deep understanding of data science principles and techniques. While not every developer needs to become a data scientist, having fluency in their jargon, familiarity with their tools, and insight into their methodologies can be a significant asset in today’s tech landscape.
In this post, we’ll delve into one of the essential tools in the data scientist’s toolkit: Jupyter Notebooks. We’ll explore what Jupyter Notebooks are and how they can be seamlessly integrated into a familiar and convenient environment like Visual Studio Code.
What is Jupyter Notebook?
Jupyter Notebook is an open-source web application that allows users to create and share documents containing live code, equations, visualizations, and narrative text. Users can write and execute code in individual cells, which are segments of the document, and immediately see the results displayed inline. Jupyter Notebook also supports the creation of rich-text documents using Markdown syntax, enabling users to provide context, explanations, and insights alongside their code. Jupyter Notebooks support various programming languages, including Python among others.
Microsoft has integrated Jupyter support directly into Visual Studio Code through an extension called Jupyter. This extension enables you to create, edit, run, and debug Jupyter Notebooks seamlessly within the Visual Studio Code environment. Leveraging Jupyter Notebooks within Visual Studio Code provides a convenient and efficient environment for data exploration, analysis, and prototyping, combining the benefits of both tools into a unified workflow.
How to run Python and Jupyter Notebooks in Visual Studio Code
To work with Python in Jupyter Notebooks in your Visual Studio Code you need to install more packages than just the Jupyter extension. Let’s see what we need. But before that you might need to check what Visual Studio Code Profiles are ![]() .
.
VSCode Profiles
A profile in Visual Studio Code is a set of customizations created by adjusting various settings, extensions, and UI layouts within the editor1. Profiles offer a convenient way to switch between different configurations. You can create a data-science profile (or ‘Python’, or ‘Mitsos’… whatever name makes sense for you) so that the extensions you install, and tha UI configurations won’t ruin your default profile/workspace. To create a new profile, you can use the File > Preferences > Profiles > Create Profile menu item. To switch between existing profiles you can hot Ctrl+Shift+P and select “Profiles: Switch Profile”


Python Environment
To run Python you need to have a Python Environment installed on your dev machine. A Python Virtual Environment is an isolated space where you can work on your Python projects, separately from your system-installed Python. The most used one is Conda. Conda is an open source tool that comes with either Anaconda or Miniconda, and it functions as both a package manager and Python environment manager. If this doesn’t yet mean a lot to you (aka you have no idea what to select ![]() ) then I suggest you go with miniconda.
) then I suggest you go with miniconda.
Install the necessary extensions
As we have already said you need to install Jupyter extension. This will automatically install more extensions for you, such as:
- Jupyter Keymap - to provide Jupyter-consistent keymaps
- Jupyter Notebook Renderers - to provide renderers for MIME types such as latex, plotly, vega, etc.
- Jupyter Cell Tags and Jupyter Slide Show - to provide the ability to tag cells in notebooks and support for presentations
Optional but useful extensions
If you want to work more with Python there more extensions you might find handy Python Extension Pack. This opinionated extension will install for you many useful extensions ![]() If you just accept the defaults (NOT!) you are good to go with this one, otherwise check its documentation and cherry-pick what you think makes more sense for you.
If you just accept the defaults (NOT!) you are good to go with this one, otherwise check its documentation and cherry-pick what you think makes more sense for you.
Cool things you can do with Jupyter Notebooks
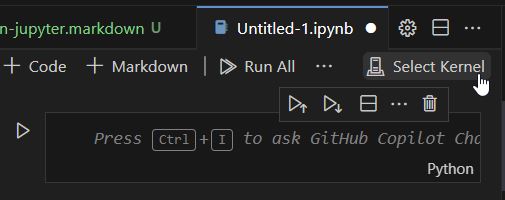
To start using Jupyter Notebooks for Python you will be asked to select Kernel. The kernel process runs in the background and executes the code that you write in your notebooks. Clicking on that, will give you the option to select (or create a new one - and this is where Conda comes handy) a Python environment that will be used to run your Python code snippets. Essentially the most useful and usual things you are going to do in a Jupyter file is to write/execute Python snippets, and write/read Markdown snippets that mainly describe/document your Python snippets.
Run terminal commands
In the Python snippets you can execute any terminal commands by prepending the command with an exclamation
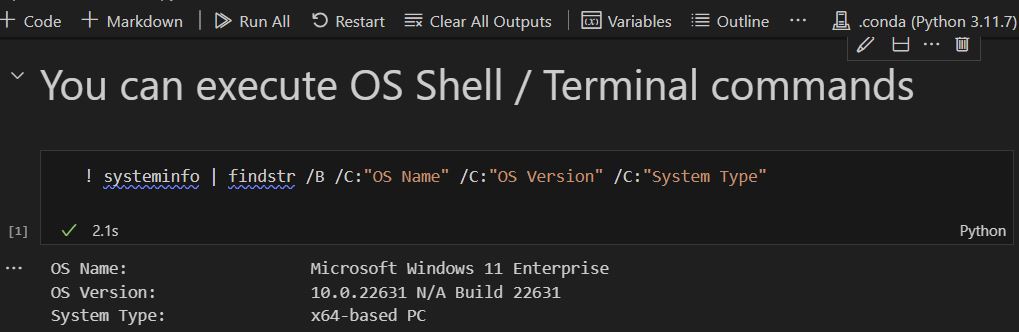
Please note, for installing Python packages in the correct environment you need to use
%pip installinstead of!pip install. More details can be found here: Install Python packages in Jupyter Notebooks
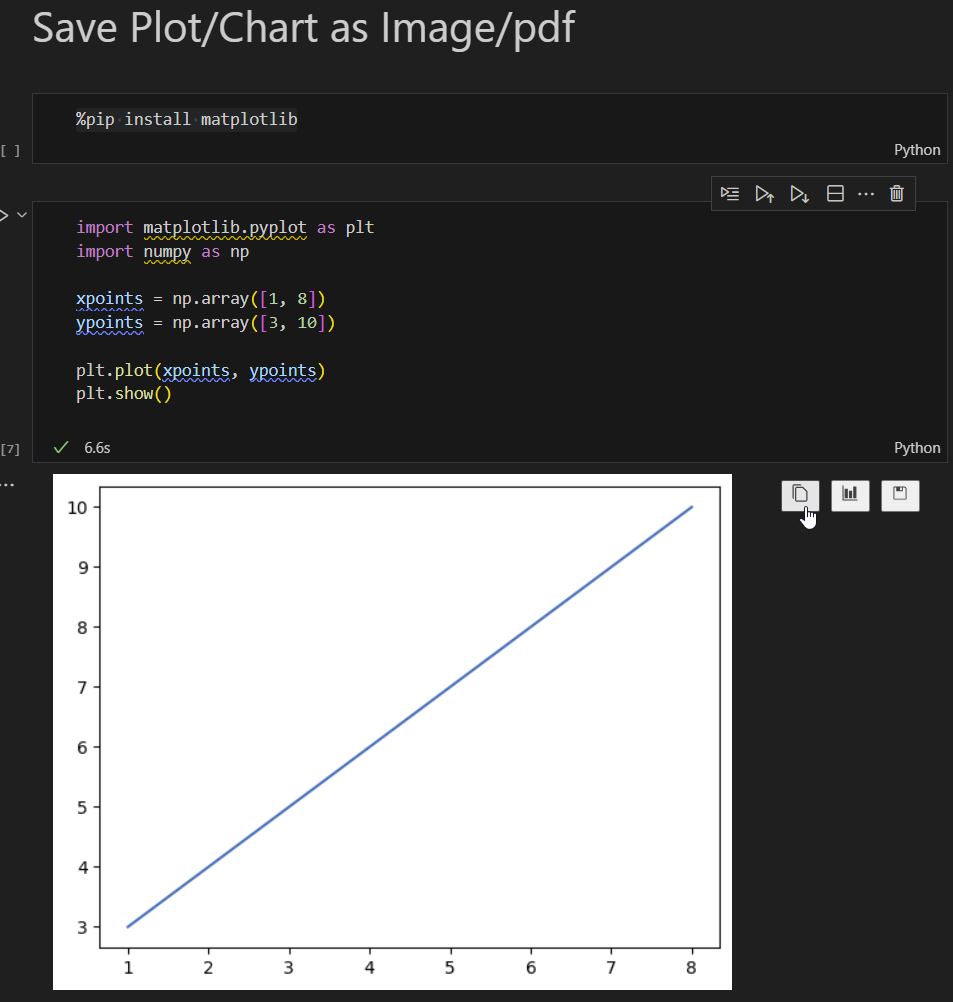
Export Charts as image
You can plot your data with sophisticated charts, and then you can export them by clicking on the buttons next to your chart.
-
The first button will copy your chart in clipboard so that you can use it in any other application, i.e. PowerPoint.
-
The third button will save the chart as image(png).
-
The second button, will open the chart in an integrated viewer, where you can change the zoom level, pan around etc. There you are given the option to save the chart not only as a png image, but also as a vector file (SVG), or a pdf document.
Variable Viewer
At the top of the notebook there is a button labeled Variables. This will open a Variable Explorer view, where you can see the values of all your variables live, meaning that if you run a snippet you can see any new values that change. Additionally, you can click on the icon in front of any 2-D data structure variable, to open a snapshot of your data frame on the data viewer, where you can see all the values of your DataFrames and you can even filter on any of them.


Export Notebook
You can export any of the Jupyter Notebooks to either Html or PDF file, by hitting Ctrl+Shift+P and selecting Jupyter: Export to…..
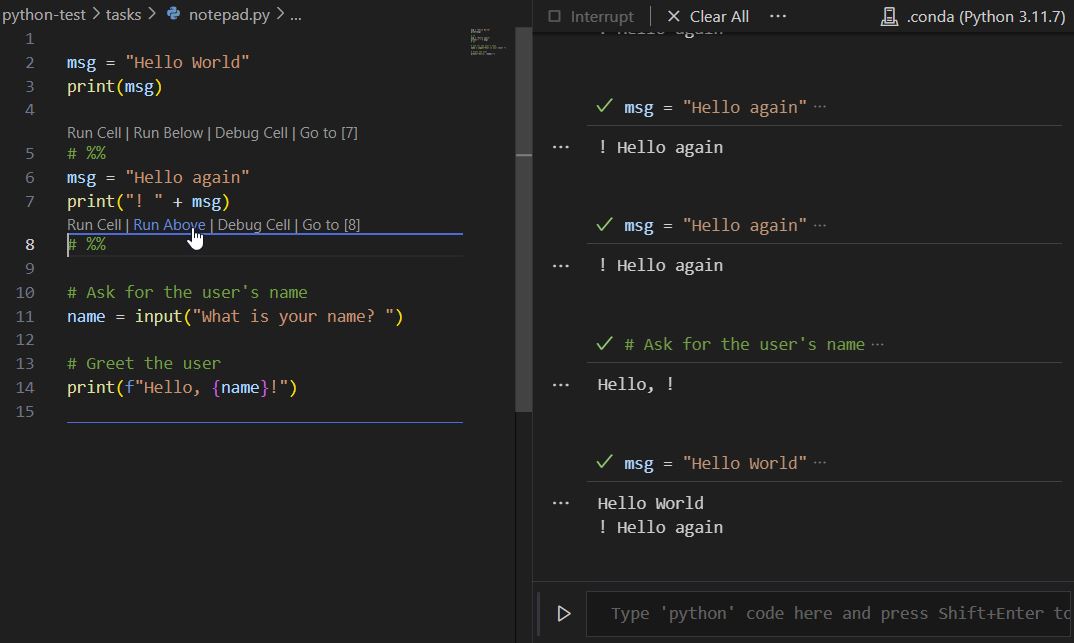
Execute Code in Interactive Window
By hitting Ctrl+Shift+P and selecting Jupyter: Create Interactive Window and Interactive window is created, where you can write any Python code and execute it by pressing Shift+Enter.
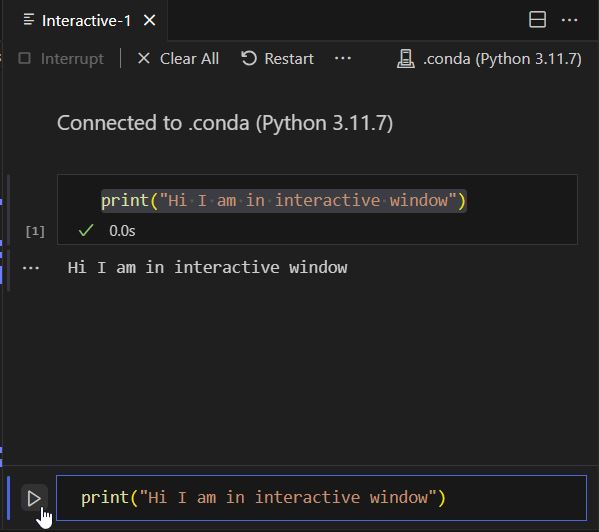
Interactive Window can be used in any Python file, not only the ones inside the Jupyter Notebook. To do that you need to surround the code snippet you want to test in the interactive windows with # %% as shown below.
Final Thoughts
By harnessing the power of Jupyter Notebooks, developers can quickly prototype, test, and refine AI-powered features, including leveraging OpenAI’s capabilities, all within the comfort of their preferred development environment. In this post we have seen, how a developer can do many of the things a data scientist is doing, from a familiar and beloved tool; the mighty VSCode.