Add your custom domain to your GitHub Pages blog
This post marks the conclusion of our ‘informal trilogy’ on how to create a blog for free. In the first part, we explored how create it with jekyll and how to host it on GitHub Pages without any cost. The second part detailed the process of obtaining a free custom domain through your Azure Subscription.
In this post, we will focus on utilizing that custom domain in your newly created blog. This way, you can personalize your URL to something other than the default <username>.github.io, allowing you to choose a web address that truly suits your style.
Supported Custom Domain Types
GitHub Pages support both subdomains and apex domains, but in this part of the series we will describe how you can use a custom subdomain. The reason for that is if you use a custom subdomain, you still have the flexibility to use more custom subdomains for other projects or tests. For example, in my case a created the custom domain nimbus-musings.com. We will describe below the process to create a custom subdomain named blog.nimbus-musings.com and use it for our blog. In that case, I can still use more custom subdomains in the future for other testing purposes, like creating some named as sampleapp01.nimbus-musings.com, sampleapp02.nimbus-musings.com, and so on.
Configure Custom Subdomain
- Go to GitHub and navigate to your site’s repository; that should have a name following this pattern
<username>.github.io. - Go to your repository’s settings and under code and automation > Pages, add the custom subdomain (i.e. blog.example.com) as shown below.
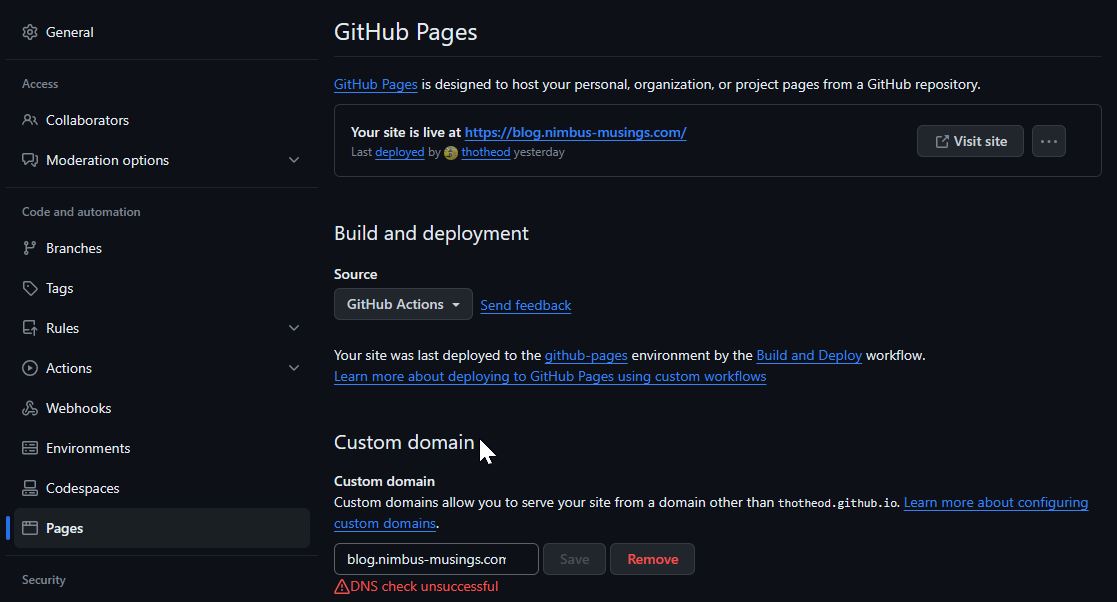 Add Custom subdomain in GitHub Pages repository
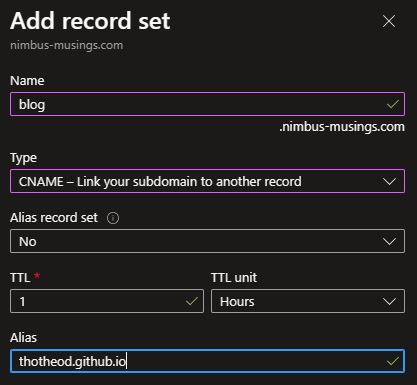
- The DNS check will fail because your custom subdomain is not yet connected to your blog. You need to create CNAME Record in your Azure DNS zone that will map your custom subdomain (alias) to the canonical name (i.e. *
.github.io*). - Navigate to your Azure Portal, select the correct subscription and resource group, and find your DNS Zone. The Azure DNS zone resource is named by the custom domain that supports (i.e. example.com). When you select the DNS zone, click on the + Record Set and create a new CNAME record as shown below.
 Add CNAME to your username.github.io canonical name
- If you go back to your repository’s settings and then under code and automation > Pages you will still see that the DNS check is either in progress or has failed. As long as this DNS check is not successful, you cannot “Enforce HTTPS,” which is highly recommended.
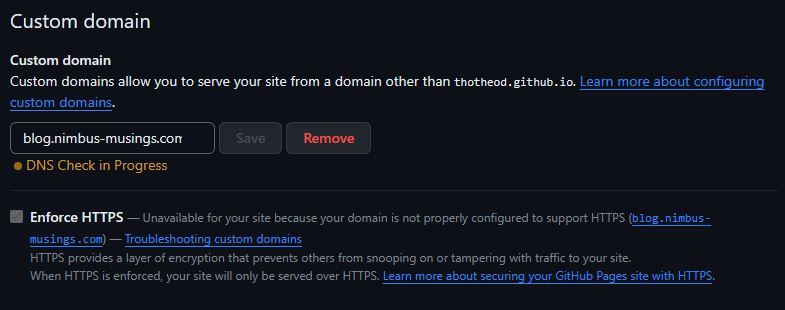 DNS Check in progress
Verify Your Custom Domain
It is essential to verify your custom subdomain for GitHub Pages. Once you successfully verify your custom subdomain, you essentially prevent other GitHub users from taking over your custom domain and using it to publish their GitHub Pages site. Therefore, it is strongly recommended that you do not use wildcard DNS records, such as *.example.com. These records put you at an immediate risk of domain takeovers, even if you verify the domain. To verify your custom subdomain:
- Click your profile photo, then click Settings
- Click on Pages (under Code, planning, and automation)
- Click on Add a domain and enter your exact subdomain, i.e.
blog.example.com(and not*.example.com). Once you press the “add domain” button you will be presented with similar information as shown below:
 GitHub Pages TXT code for domain verification
- Go to your azure portal, find your Azure DNS zone resource and click on the + Record Set to create a new TXT record as shown below
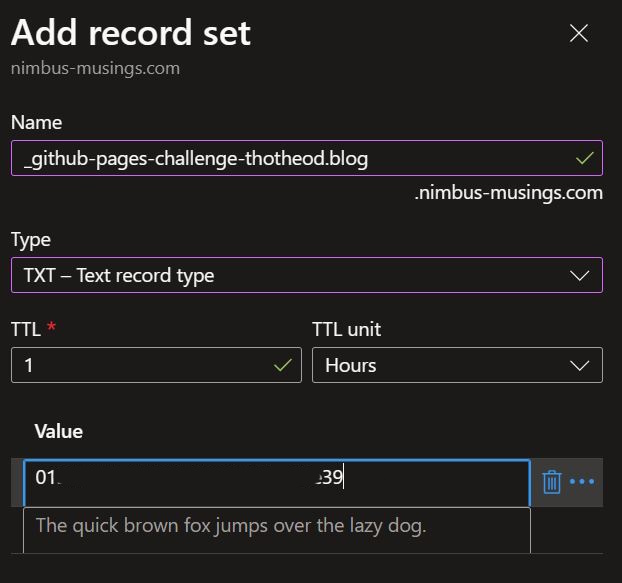 Create a TXT Record
- Once you create the TXT record, back on your GitHub Pages settings the domain you have added will be tagged with a green “verified” tag
 GitHub Pages Verified Domain
Now that your custom domain is configured and correctly verified, you can enable HTTPS, which adds a layer of encryption that prevents others from snooping on or tampering with traffic to your site.
Final Thoughts
In this concluding chapter of our three-part series on creating and hosting a blog for free, you’ve learned how to customize your blog’s web address to something that truly represents your unique style. By configuring a custom subdomain on GitHub Pages and verifying it, you’ve not only personalized your URL but also secured it against potential takeovers. With your custom domain correctly configured and verified, you’re now ready to take the next step in securing your blog by enabling HTTPS, ensuring your visitors’ data remains private.
Whether you’re sharing your thoughts, showcasing projects, or experimenting with new ideas, your cost-free blog is now set to leave a lasting digital mark. I hope you enjoy this series, and if you have any questions, don’t hesitate to reach out.